Part 4 - Frame Re-assembly
Frame Re-assembly
Lightly oil the following parts:
• Trigger Axle
• Trigger Bar
• Trigger Bar Detent
• Trigger Bar Detent Spring
• Hammer
• Hammer Axle (or right-side Safety Lever shaft on a P30S/P30LS)
• Hammer Strut
• Hammer Spring
• Sear Axle
• Disconnector
• Control Latch
• Catch
• Sear with Decocker
• Flat Sear Spring
Step 1
• Insert the Trigger into the frame
• Locate the Trigger Axle hole and sleeve the 1/16 regular punch through the Trigger

Step 2
• Insert the 2 small strips of a coffee stirrer onto the Trigger Rebound Spring legs


• Insert the Trigger Rebound Spring into the frame. The spring's right leg (the longer of the two) will be on the right side of the frame

• The spring's left leg will stick out behind the trigger

• With the punch sitting flush against the right side of the frame, grab the Trigger Rebound Spring with the needle-nose pliers and push it down
• Sleeve the punch through the spring until it protrudes from the left side of the frame

• Insert the Trigger Axle into the frame from the left side of the frame, backing out the punch

• With the punch sitting flush against the right side of the frame, grab the Trigger Rebound Spring with the needle-nose pliers and push it down
• Sleeve the punch through the spring until it protrudes from the left side of the frame
• Insert the Trigger Axle into the frame from the left side of the frame, backing out the punch
• Tap the Trigger Axle into the frame so that the other end of the axle sits flush with the right side of the frame
• Remove the coffee stirrer strips
Step 3
• Insert the right-side Slide Release Lever into the frame. Insert it at a 30-degree angle then flip it down


Step 4
• Insert the left-side Slide Release Lever until it hits the Trigger Rebound Spring's right leg
• Using the dental pick, lift up the spring's right leg, then push the Slide Release Lever in completely
• Release the spring's leg. It should rest upon the groove on the Slide Release Lever

Step 5
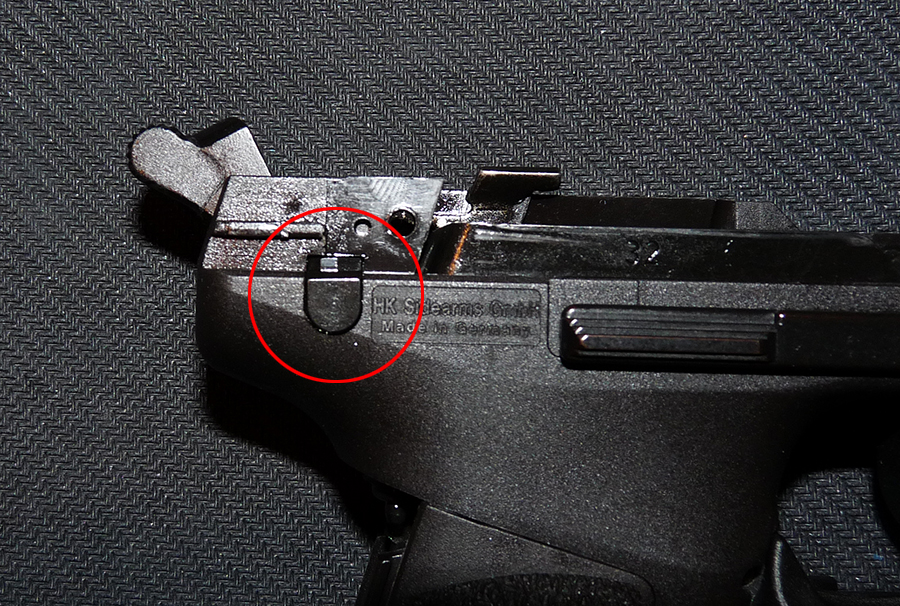
• Grab the Flat Sear Spring with the needle-nose pliers and insert it into the frame. Make sure it clicks.

Step 6
• Assemble the Trigger Bar Detent and its spring, then drop them into the frame. Push down lightly on the Trigger Bar Detent to lock it in place
• While pulling back lightly on the trigger, insert the Trigger Bar onto the eyelet on the trigger. Put a drop of oil where the Trigger Bar connects to the trigger

• Flip down the Trigger Bar so that it rests right on top of the Trigger Bar Detent

Step 7
• Drop the Hammer Strut into the frame
• A small piece of painter's masking tape would help secure the strut to the grip, preventing it from moving around while installing the hammer parts

Step 8
If yours is a P30S or P30LS, skip to step 9
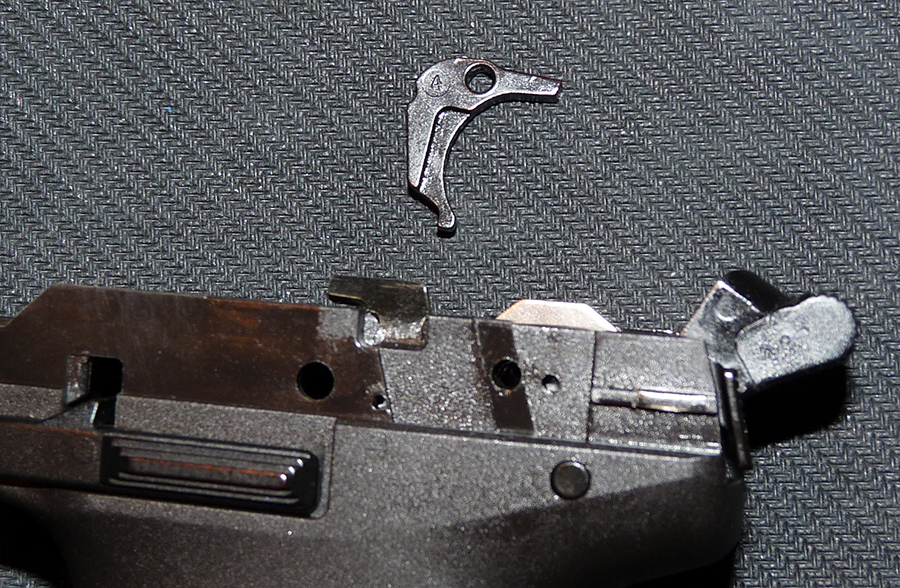
• Drop the Hammer into the frame

• While depressing lightly on the Trigger Bar, insert the Hammer Axle from the right side of the frame through the hammer, until it sits flush with the right side of the frame

• The axle should also sit flush on the left side of the frame

Step 9
If yours is a P30 or P30L, continue to step 10
• Drop the Hammer into the frame
• While depressing lightly on the Trigger Bar, insert the right-side Safety Lever through the hammer until it touches the right side of the frame

• Insert the left-side Safety Lever Detent Spring into the cavity on the frame

• Drop the Safety Lever Detent on top of the spring


• Insert the tiny Safety Lever Retaining Pin into the lever, just enough so that it sits flush with the inside of the lever

• Mount the left-side Safety Lever onto the Hammer Axle

• While applying a little pressure on the left-side Safety Lever against the left side of the frame, tap the tiny pin into the lever using the 1/16 roll-pin punch, until it completely sits inside the lever, securing it in place. If you don't apply pressure on the lever against the frame, you won't be able to tap in the roll pin

Step 10
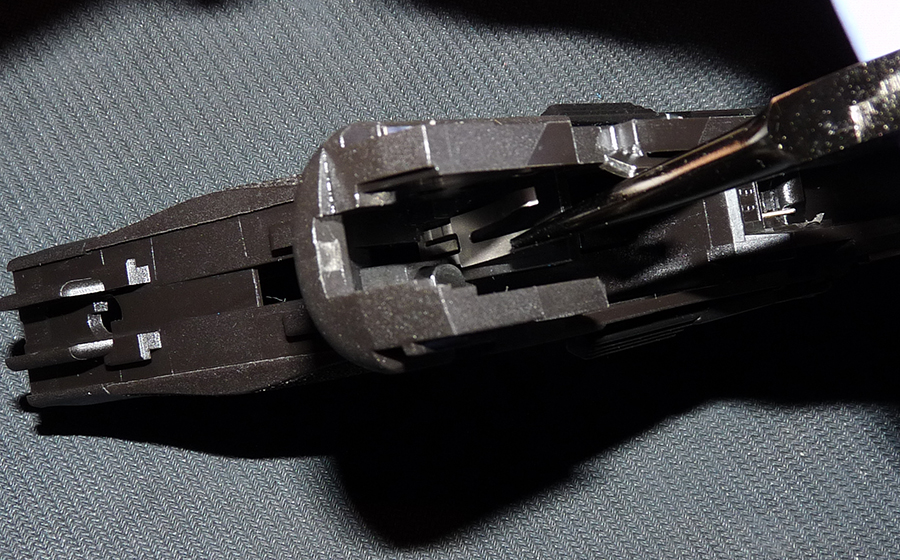
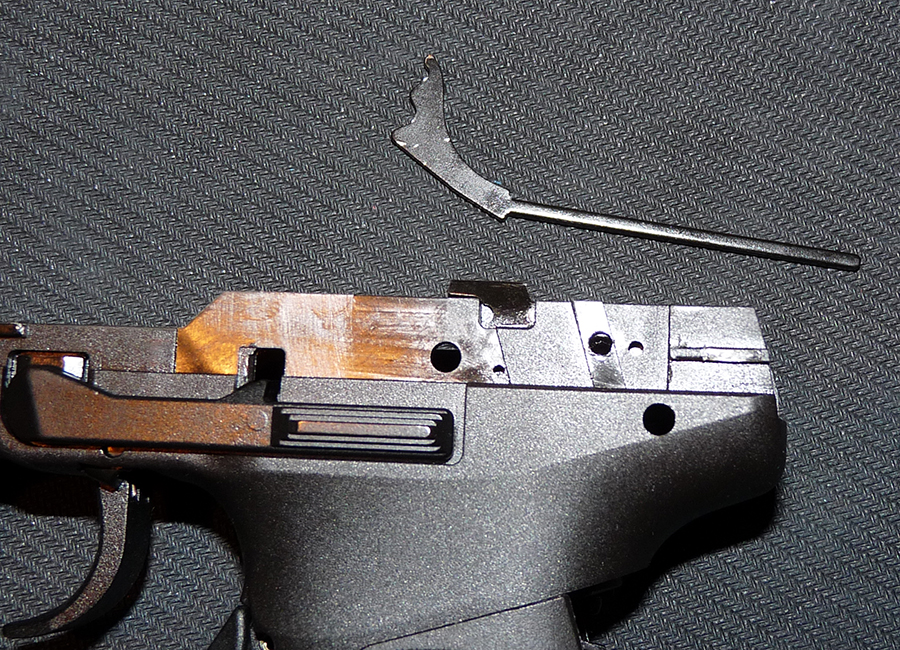
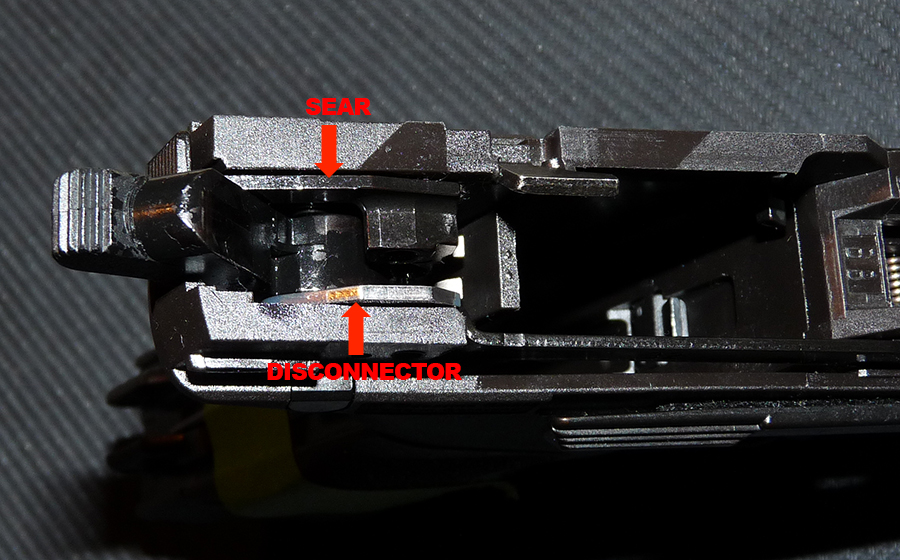
• Insert the Disconnector


• Insert the Sear with Decocker. It should go between the Flat Sear Spring and Hammer

• Insert the Control Lever (aka Control Latch)


• Insert the Catch. It should go between the Flat Sear Spring and Hammer Axle

• Sleeve the 3/32 punch from the right side of the frame through these parts, until it protrudes from the left side of the frame

• Make sure the larger end of the Sear Axle is facing the left side of the frame
• Insert the axle from the left side of the frame, backing out the punch

• Both ends of the Sear Axle should sit flush with the frame
Step 11
• Insert the Hammer Spring onto the Hammer Strut
• Make sure the Hammer Strut is positioned correctly in the frame


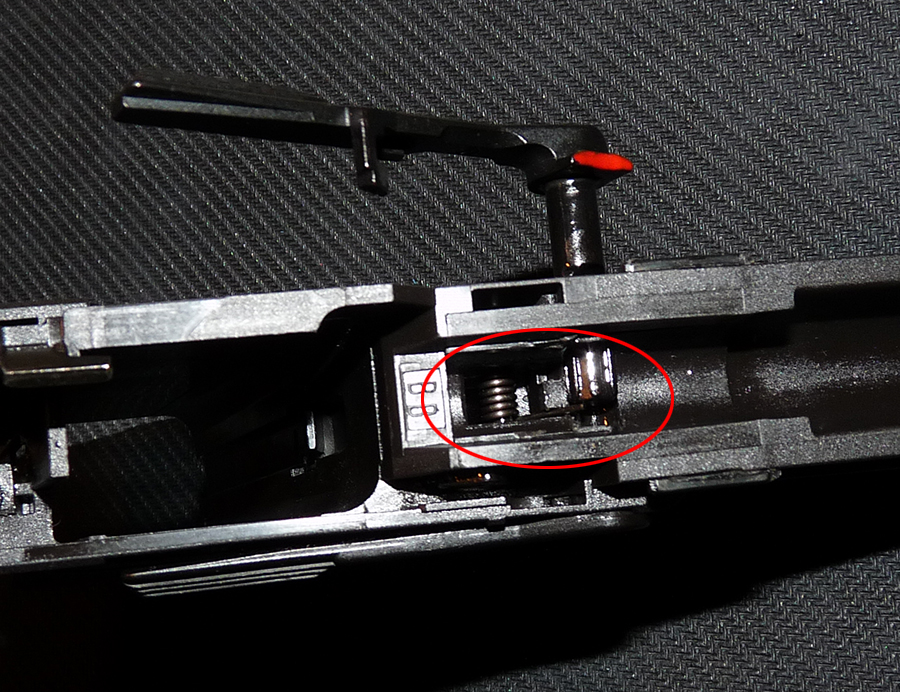
• Insert the other end of the Hammer Spring into the Hammer Spring Bearing (pay attention to the Hammer Spring Bearing orientation)
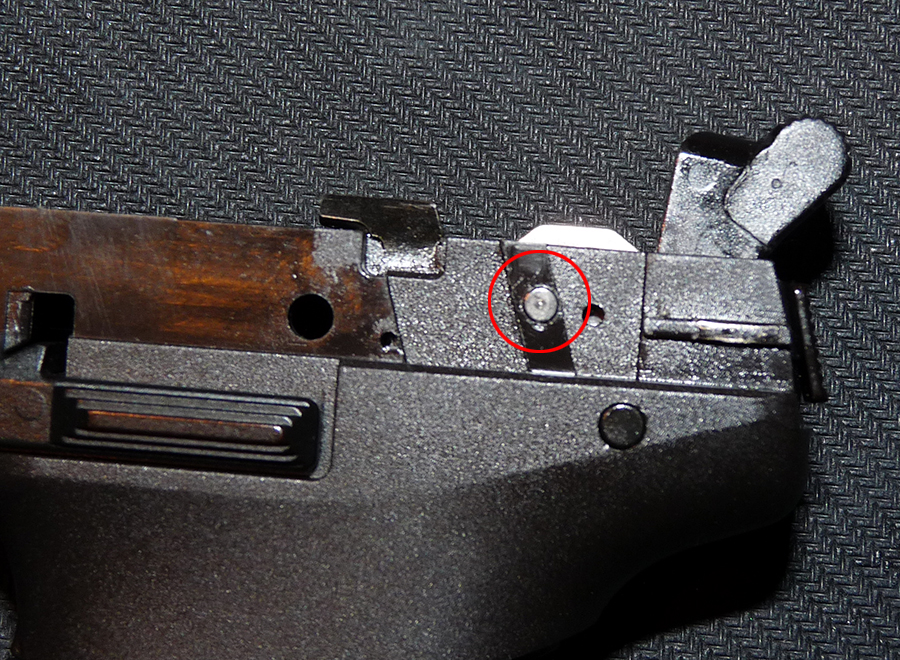
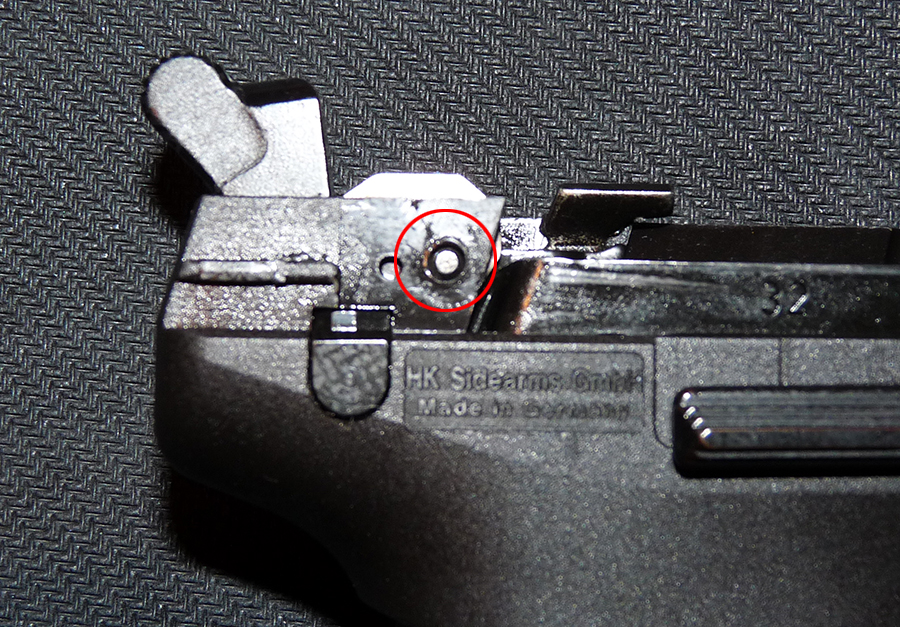
• Using the butt of a punch, push up lightly on the Hammer Spring Bearing and insert the retaining pin into the upper hole on the bearing (circled in RED). The lower hole is for the backstrap roll pin


Step 12
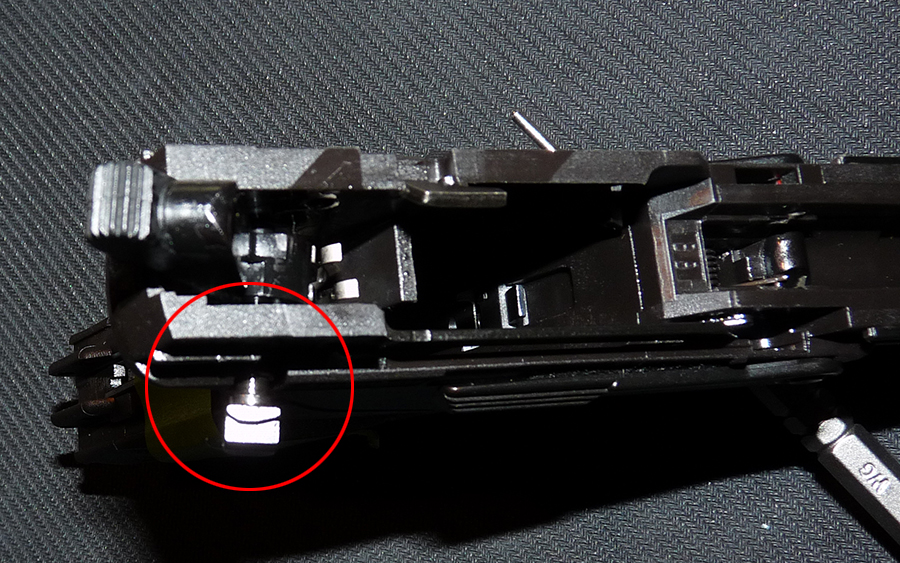
• Mount the backstrap onto the grip
• Insert the backstrap roll pin and tap it in, using the 3/32 roll-pin punch


The frame is now completely re-assembled.

Frame Re-assembly
Lightly oil the following parts:
• Trigger Axle
• Trigger Bar
• Trigger Bar Detent
• Trigger Bar Detent Spring
• Hammer
• Hammer Axle (or right-side Safety Lever shaft on a P30S/P30LS)
• Hammer Strut
• Hammer Spring
• Sear Axle
• Disconnector
• Control Latch
• Catch
• Sear with Decocker
• Flat Sear Spring
Step 1
• Insert the Trigger into the frame
• Locate the Trigger Axle hole and sleeve the 1/16 regular punch through the Trigger
Step 2
• Insert the 2 small strips of a coffee stirrer onto the Trigger Rebound Spring legs
• Insert the Trigger Rebound Spring into the frame. The spring's right leg (the longer of the two) will be on the right side of the frame
• The spring's left leg will stick out behind the trigger
• With the punch sitting flush against the right side of the frame, grab the Trigger Rebound Spring with the needle-nose pliers and push it down
• Sleeve the punch through the spring until it protrudes from the left side of the frame
• Insert the Trigger Axle into the frame from the left side of the frame, backing out the punch
• Tap the Trigger Axle into the frame so that the other end of the axle sits flush with the right side of the frame
• Remove the coffee stirrer strips
Step 3
• Insert the right-side Slide Release Lever into the frame. Insert it at a 30-degree angle then flip it down
Step 4
• Insert the left-side Slide Release Lever until it hits the Trigger Rebound Spring's right leg
• Using the dental pick, lift up the spring's right leg, then push the Slide Release Lever in completely
• Release the spring's leg. It should rest upon the groove on the Slide Release Lever
Step 5
• Grab the Flat Sear Spring with the needle-nose pliers and insert it into the frame. Make sure it clicks.
Step 6
• Assemble the Trigger Bar Detent and its spring, then drop them into the frame. Push down lightly on the Trigger Bar Detent to lock it in place
• While pulling back lightly on the trigger, insert the Trigger Bar onto the eyelet on the trigger. Put a drop of oil where the Trigger Bar connects to the trigger
• Flip down the Trigger Bar so that it rests right on top of the Trigger Bar Detent
Step 7
• Drop the Hammer Strut into the frame
• A small piece of painter's masking tape would help secure the strut to the grip, preventing it from moving around while installing the hammer parts
Step 8
If yours is a P30S or P30LS, skip to step 9
• Drop the Hammer into the frame
• While depressing lightly on the Trigger Bar, insert the Hammer Axle from the right side of the frame through the hammer, until it sits flush with the right side of the frame
• The axle should also sit flush on the left side of the frame
Step 9
If yours is a P30 or P30L, continue to step 10
• Drop the Hammer into the frame
• While depressing lightly on the Trigger Bar, insert the right-side Safety Lever through the hammer until it touches the right side of the frame
• Insert the left-side Safety Lever Detent Spring into the cavity on the frame
• Drop the Safety Lever Detent on top of the spring
• Insert the tiny Safety Lever Retaining Pin into the lever, just enough so that it sits flush with the inside of the lever
• Mount the left-side Safety Lever onto the Hammer Axle
• While applying a little pressure on the left-side Safety Lever against the left side of the frame, tap the tiny pin into the lever using the 1/16 roll-pin punch, until it completely sits inside the lever, securing it in place. If you don't apply pressure on the lever against the frame, you won't be able to tap in the roll pin
Step 10
• Insert the Disconnector
• Insert the Sear with Decocker. It should go between the Flat Sear Spring and Hammer
• Insert the Control Lever (aka Control Latch)
• Insert the Catch. It should go between the Flat Sear Spring and Hammer Axle
• Sleeve the 3/32 punch from the right side of the frame through these parts, until it protrudes from the left side of the frame
• Make sure the larger end of the Sear Axle is facing the left side of the frame
• Insert the axle from the left side of the frame, backing out the punch
• Both ends of the Sear Axle should sit flush with the frame
Step 11
• Insert the Hammer Spring onto the Hammer Strut
• Make sure the Hammer Strut is positioned correctly in the frame
• Insert the other end of the Hammer Spring into the Hammer Spring Bearing (pay attention to the Hammer Spring Bearing orientation)
• Using the butt of a punch, push up lightly on the Hammer Spring Bearing and insert the retaining pin into the upper hole on the bearing (circled in RED). The lower hole is for the backstrap roll pin
Step 12
• Mount the backstrap onto the grip
• Insert the backstrap roll pin and tap it in, using the 3/32 roll-pin punch
The frame is now completely re-assembled.
