Starting the new project-HK21

Grease Gunner

Well-known member
Joined
Nov 22, 2020
Posts
562
Location
Tuscarawas County Ohio
Feedback: 2 / 0 / 0
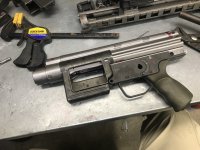
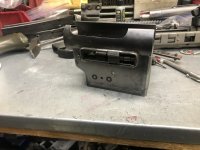
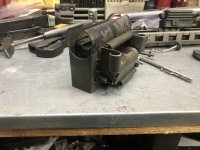
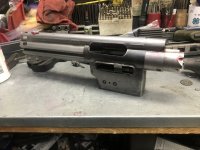
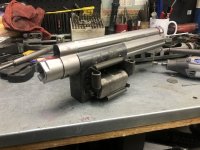
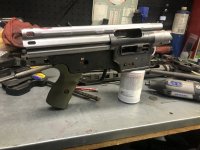
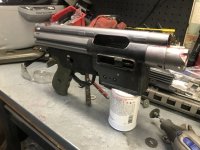
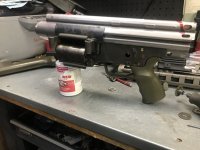
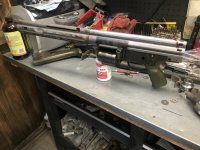
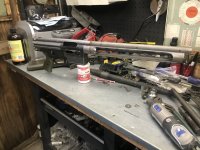
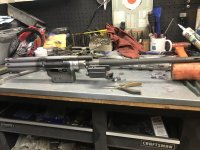
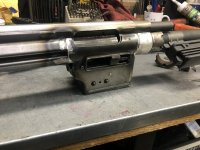
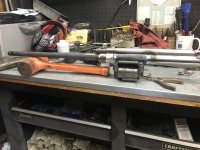
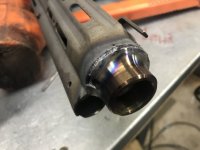
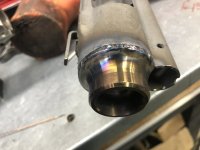
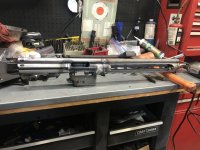
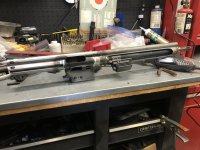
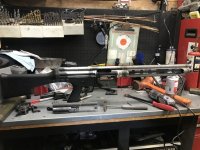
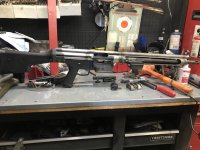
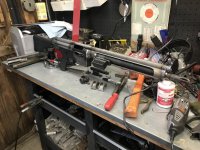
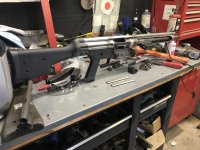
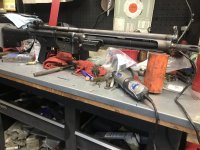
Well I’m finally starting the tough project......the HK21. I’ve spent all afternoon cutting, fitting, grinding, cussing, cutting, fitting, grinding, cussing, cutting, fitting.....well you get the idea LMAO

I have the receiver rolled and bolt assembly sliding, I have the feed mech fitted to the feed mech housing, the housing fitted to the receiver, and the feed mech is now in the housing which is in the receiver. It’s just about ready to weld....this week is going to be interesting.
 

Attachments

  • EF8ABFBE-67EA-4008-870F-08892E8868BF.jpeg
    EF8ABFBE-67EA-4008-870F-08892E8868BF.jpeg
    158 KB · Views: 34
  • 98D29D13-C4D7-492F-86A7-1BF23D1CF86F.jpeg
    98D29D13-C4D7-492F-86A7-1BF23D1CF86F.jpeg
    135.3 KB · Views: 26
  • A10B1FE1-411A-40DC-871F-9789CB222541.jpeg
    A10B1FE1-411A-40DC-871F-9789CB222541.jpeg
    141.3 KB · Views: 25
  • 06898B94-C537-44C2-8931-3A14975A1980.jpeg
    06898B94-C537-44C2-8931-3A14975A1980.jpeg
    138.9 KB · Views: 28
  • 50E7E6B5-D0C9-479C-A99D-E028ED365A9A.jpeg
    50E7E6B5-D0C9-479C-A99D-E028ED365A9A.jpeg
    146.9 KB · Views: 27
  • E797A7B7-372F-4577-9D2A-B05E80CA2DC0.jpeg
    E797A7B7-372F-4577-9D2A-B05E80CA2DC0.jpeg
    135.2 KB · Views: 30
  • 7600C9BD-2217-4FF2-A827-6AEE3C425CA8.jpeg
    7600C9BD-2217-4FF2-A827-6AEE3C425CA8.jpeg
    136.9 KB · Views: 27
  • 169FBEF5-75AB-4A63-B67F-6716D983344C.jpeg
    169FBEF5-75AB-4A63-B67F-6716D983344C.jpeg
    126.7 KB · Views: 25
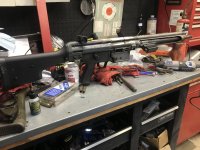
Well at this point I wish I could afford to feed it as all my spare money from my business has gone into this R&D project for building this gun as I have other wanting to see how it turns out. If all goes well...I’m likely going to be building a few more.

Parts ain’t cheap when it comes to HK and when you say “HK belt fed” add another zero to the end of any part you look at buying hahahahaha
 
Spent the afternoon/evening in the shop doing some welding. Have the trunion in, feed mech housing welded on, the feed mech fits in, the barrel head space looks good, so now I need to add the rear stock pin bushings, semi auto shelf, and then work on the shroud....10 hours and counting at this point......
 

Attachments

  • 6748F410-4364-4031-81F7-12A8CD26FF07.jpeg
    6748F410-4364-4031-81F7-12A8CD26FF07.jpeg
    145.8 KB · Views: 26
  • DBFF2E7C-DF69-4247-9F7F-C7CD9657D83C.jpeg
    DBFF2E7C-DF69-4247-9F7F-C7CD9657D83C.jpeg
    146.5 KB · Views: 26
  • F3146E37-D36C-44F2-8C1E-C067D26C3EAE.jpeg
    F3146E37-D36C-44F2-8C1E-C067D26C3EAE.jpeg
    141.5 KB · Views: 26
Spent the afternoon/evening in the shop doing some welding. Have the trunion in, feed mech housing welded on, the feed mech fits in, the barrel head space looks good, so now I need to add the rear stock pin bushings, semi auto shelf, and then work on the shroud....10 hours and counting at this point......

Nice work. :)

Tony
 
I came home from work early....let’s just say I’ll be looking for a new job soon as I was sold a line....I spent my day on my safe place working on a project.....whatcha think??

I have to weld on the receiver stiffeners, rear sight mount, mid mount for an AA tripod mount, a short pic rail section on the front for using a modern bipod. Then it’ll be final assembly and test fire.....I hope....
 

Attachments

  • 26ABDAA5-8AC3-48A8-B494-3D51A07A500E.jpeg
    26ABDAA5-8AC3-48A8-B494-3D51A07A500E.jpeg
    82.8 KB · Views: 24
  • 5D5C9700-DBAF-44EB-A5A2-75CB3301378D.jpeg
    5D5C9700-DBAF-44EB-A5A2-75CB3301378D.jpeg
    90 KB · Views: 16
  • 1EF43DAE-922E-4B01-B58A-7E3619BE2609.jpeg
    1EF43DAE-922E-4B01-B58A-7E3619BE2609.jpeg
    147.8 KB · Views: 22
  • C944362C-C795-49CB-AF74-9AF9E3A16E80.jpeg
    C944362C-C795-49CB-AF74-9AF9E3A16E80.jpeg
    147.2 KB · Views: 16
  • 28B8BA12-C98B-4152-A370-2B1449ACF129.jpeg
    28B8BA12-C98B-4152-A370-2B1449ACF129.jpeg
    160.8 KB · Views: 18
  • CAFCB3DB-AC75-48A4-B52B-F6E20782EC0B.jpeg
    CAFCB3DB-AC75-48A4-B52B-F6E20782EC0B.jpeg
    144.9 KB · Views: 16
  • CEC8A7F1-2794-42F8-8151-078E63E61ACA.jpeg
    CEC8A7F1-2794-42F8-8151-078E63E61ACA.jpeg
    176.6 KB · Views: 18
  • 84D51CBB-F552-4FB7-9CEC-DF0F7105F485.jpeg
    84D51CBB-F552-4FB7-9CEC-DF0F7105F485.jpeg
    160 KB · Views: 18
Well I have the HK21 all put together. Now I have to get it tuned to run. It won’t chamber a round out of the belt-it stops out of battery and I can’t see where or why.

It will fire when dropping a round into the chamber but when I fire it with the feed mech in-it will extract the case but not eject it. With the feed mech out it will extract and eject the empty case.

Thoughts??
 

Attachments

  • D97ADB10-CF0D-4415-A104-4A384A874B34.jpeg
    D97ADB10-CF0D-4415-A104-4A384A874B34.jpeg
    157.1 KB · Views: 12
  • D36527FE-26A8-43F4-A0FC-675A011EDE2C.jpeg
    D36527FE-26A8-43F4-A0FC-675A011EDE2C.jpeg
    152.8 KB · Views: 12
Update-after working on the gun the morning I think I have the wrong recoil spring for it. It seems like it’s running out of steam before it gets fully into battery.

I’ve done the following-
Test bolt with no feed mech
Test bolt with top plate no feed mech
Test with bolt top plate and mech

All these tests were with and without a belt also all these tests were done with and without the lower on it.

Im finding that the bolt is stopping in the exact same place each time and when I advance the belt by hand, the bolt kicks forward. Everything cycles smooth so I’m coming the the point it’s not a heavy enough spring due to all the forces working on th bolt as it gets closer to locking up.

Looks like I’ll have to order a few things and try this again once I get parts in.
 
Had a crazy idea today at work-how to test if spring tension is my issue.....well why not make a spacer to compress the spring and see if the added tension would cycle the gun.

So with that in mind I came home, made a split sleeve, pressed it on the recoil spring rod, put it inside the carrier tube (so it’s completely captured) and then tested it on the bench-and it WORKS! I tested it with the lower off of it and the lower with just the ejector installed. No issues. I have to trim the full auto trip so it’ll close fully but that’s not a big deal. I’m happy with now seeing it close completely.
 

IT LIVES!!!!! Had it running great with a semi auto trigger pack. Had to lengthen the ejection port as it was bouncing the cases back into the feed area. I made the opening 3/16” longer and it now runs.....now I have to tune a trip lever for a full auto pack and try that out. I should have it running full by the weekend.....I hope!!
 

IT LIVES!!!!! Had it running great with a semi auto trigger pack. Had to lengthen the ejection port as it was bouncing the cases back into the feed area. I made the opening 3/16” longer and it now runs.....now I have to tune a trip lever for a full auto pack and try that out. I should have it running full by the weekend.....I hope!!
Man that looks good!
love the tag line …. About time you did that!👍👍👍
M.
 
Back
Top