Part 3 - Disassembly of Trigger Housing
Step 1
• Locate the roll-pin for Trigger Housing Insert
• Using the 2.4mm (3/32") punch, drive out the roll-pin

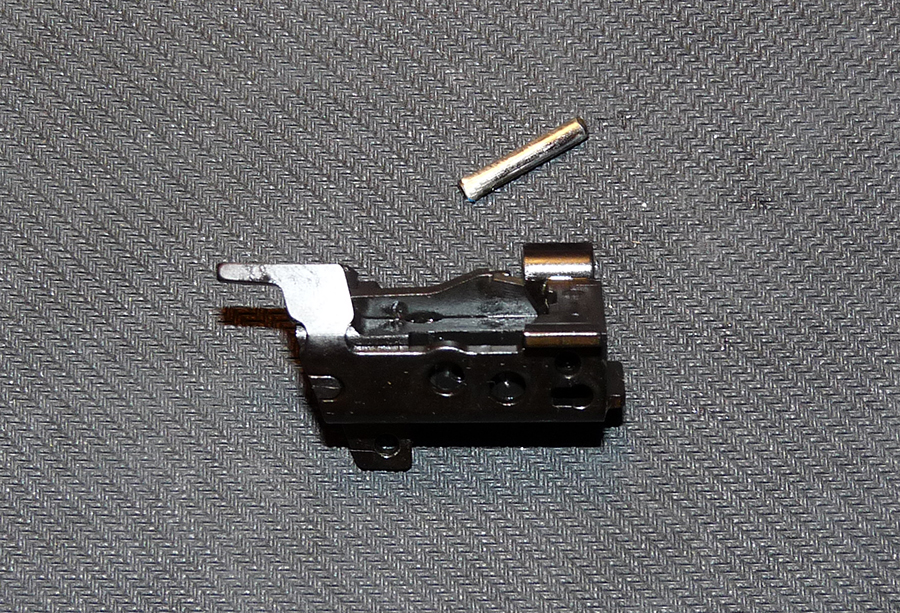
Step 2
• Slide out the Trigger Insert from the Trigger Housing

Step 3
• Locate the Sear Release Catch inside the Insert
• Using the 1.8mm (1/16") punch, locate the roll-pin and push it out (no force needed)
• Remove the Sear Release Catch

Step 4
• Locate the Catch inside the Insert
• Using the 1.8mm (1/16"), locate the roll-pin and push it out (no force needed)
• Remove the Catch
Parts identification
1. Insert
2. Catch and Pressure Spring
3. Roll pin for Catch
4. Sear Release Catch
5. Roll pin for Sear Release Catch
6. Roll pin for Trigger Housing
7. Trigger Housing

Part 4 - Reassembly of Trigger Housing
Step 1
• Make sure the Pressure Spring is attached to the Catch
• Locate the are circled in Red on the Insert

Step 2
• Mount the Catch on the Insert. The spring goes inside the cavity (circled in Red in the picture in the previous step)
• Insert the Catch roll-pin from the left side of the Insert and push it all the way in while pushing down and lining up the Catch with the roll-pin
• The roll-pin should sit flush against the left side of the Insert


Step 3
• Push down lightly on the Catch while inserting the Sear Release Catch into the Insert
• Insert the roll-pin from the right side of the Insert
• Make sure it sits flush with the right side of the Insert (circled in Red)


Step 4
• Slide the Insert inside the Trigger Housing


Step 5
• Line up the Insert inside the Trigger Housing and drive the roll-pin through the Housing + Insert to secure it

Step 1
• Locate the roll-pin for Trigger Housing Insert
• Using the 2.4mm (3/32") punch, drive out the roll-pin
Step 2
• Slide out the Trigger Insert from the Trigger Housing
Step 3
• Locate the Sear Release Catch inside the Insert
• Using the 1.8mm (1/16") punch, locate the roll-pin and push it out (no force needed)
• Remove the Sear Release Catch
Step 4
• Locate the Catch inside the Insert
• Using the 1.8mm (1/16"), locate the roll-pin and push it out (no force needed)
• Remove the Catch
Parts identification
1. Insert
2. Catch and Pressure Spring
3. Roll pin for Catch
4. Sear Release Catch
5. Roll pin for Sear Release Catch
6. Roll pin for Trigger Housing
7. Trigger Housing
Part 4 - Reassembly of Trigger Housing
Step 1
• Make sure the Pressure Spring is attached to the Catch
• Locate the are circled in Red on the Insert
Step 2
• Mount the Catch on the Insert. The spring goes inside the cavity (circled in Red in the picture in the previous step)
• Insert the Catch roll-pin from the left side of the Insert and push it all the way in while pushing down and lining up the Catch with the roll-pin
• The roll-pin should sit flush against the left side of the Insert
Step 3
• Push down lightly on the Catch while inserting the Sear Release Catch into the Insert
• Insert the roll-pin from the right side of the Insert
• Make sure it sits flush with the right side of the Insert (circled in Red)
Step 4
• Slide the Insert inside the Trigger Housing
Step 5
• Line up the Insert inside the Trigger Housing and drive the roll-pin through the Housing + Insert to secure it